Guidelines for contributors
Code of conduct
![]()
Contributers are to kindly stick to the following guidelines and the contributor covenant code of conduct to avoid conflicts and misunderstandings during the collaboration process.
Types of Contributions
A contribution can be one of the following cases:
you have a question;
you think you may have found a bug (including unexpected behaviour);
you want to make some changes to the code base (e.g. to fix a bug, to add a new feature, to update documentation).
The sections below outline the steps in each case.
Questions
use the search functionality here to see if someone already filed the same issue;
if your issue search did not yield any relevant results, make a new issue;
apply the “Question” label; apply other labels when relevant.
Find Bugs
If you think you may have found a bug:
use the search functionality here to see if someone already filed the same issue;
if your issue search did not yield any relevant results, make a new issue, making sure to provide enough information to the rest of the community to understand the cause and context of the problem. Depending on the issue, you may want to include:
the SHA hashcode of the commit that is causing your problem;
some identifying information (name and version number) for dependencies you’re using;
information about the operating system;
detailed steps to reproduce the bug.
apply relevant labels to the newly created issue.
Changes to Source Code: fix bugs and add features
(important) announce your plan to the rest of the community before you start working. This announcement should be in the form of a (new) issue;
(important) wait until some consensus is reached about your idea is a good idea;
if needed, fork the repository to your own Github profile and create your feature branch out of the latest master commit. While working on your feature branch, make sure to stay up to date with the master branch by pulling in changes;
make sure the existing tests still work;
add your tests (if applicable);
update or expand the documentation;
push your feature branch to (your fork of) this repository on GitHub;
create the pull request, e.g. following the instructions here.
Following sections are specific instruction to guide you in executing steps 3 to 8 of the list above.
Steps for Contributing
Steps for developing the package
Ensure that the prerequists from the documentation have been satisfied.
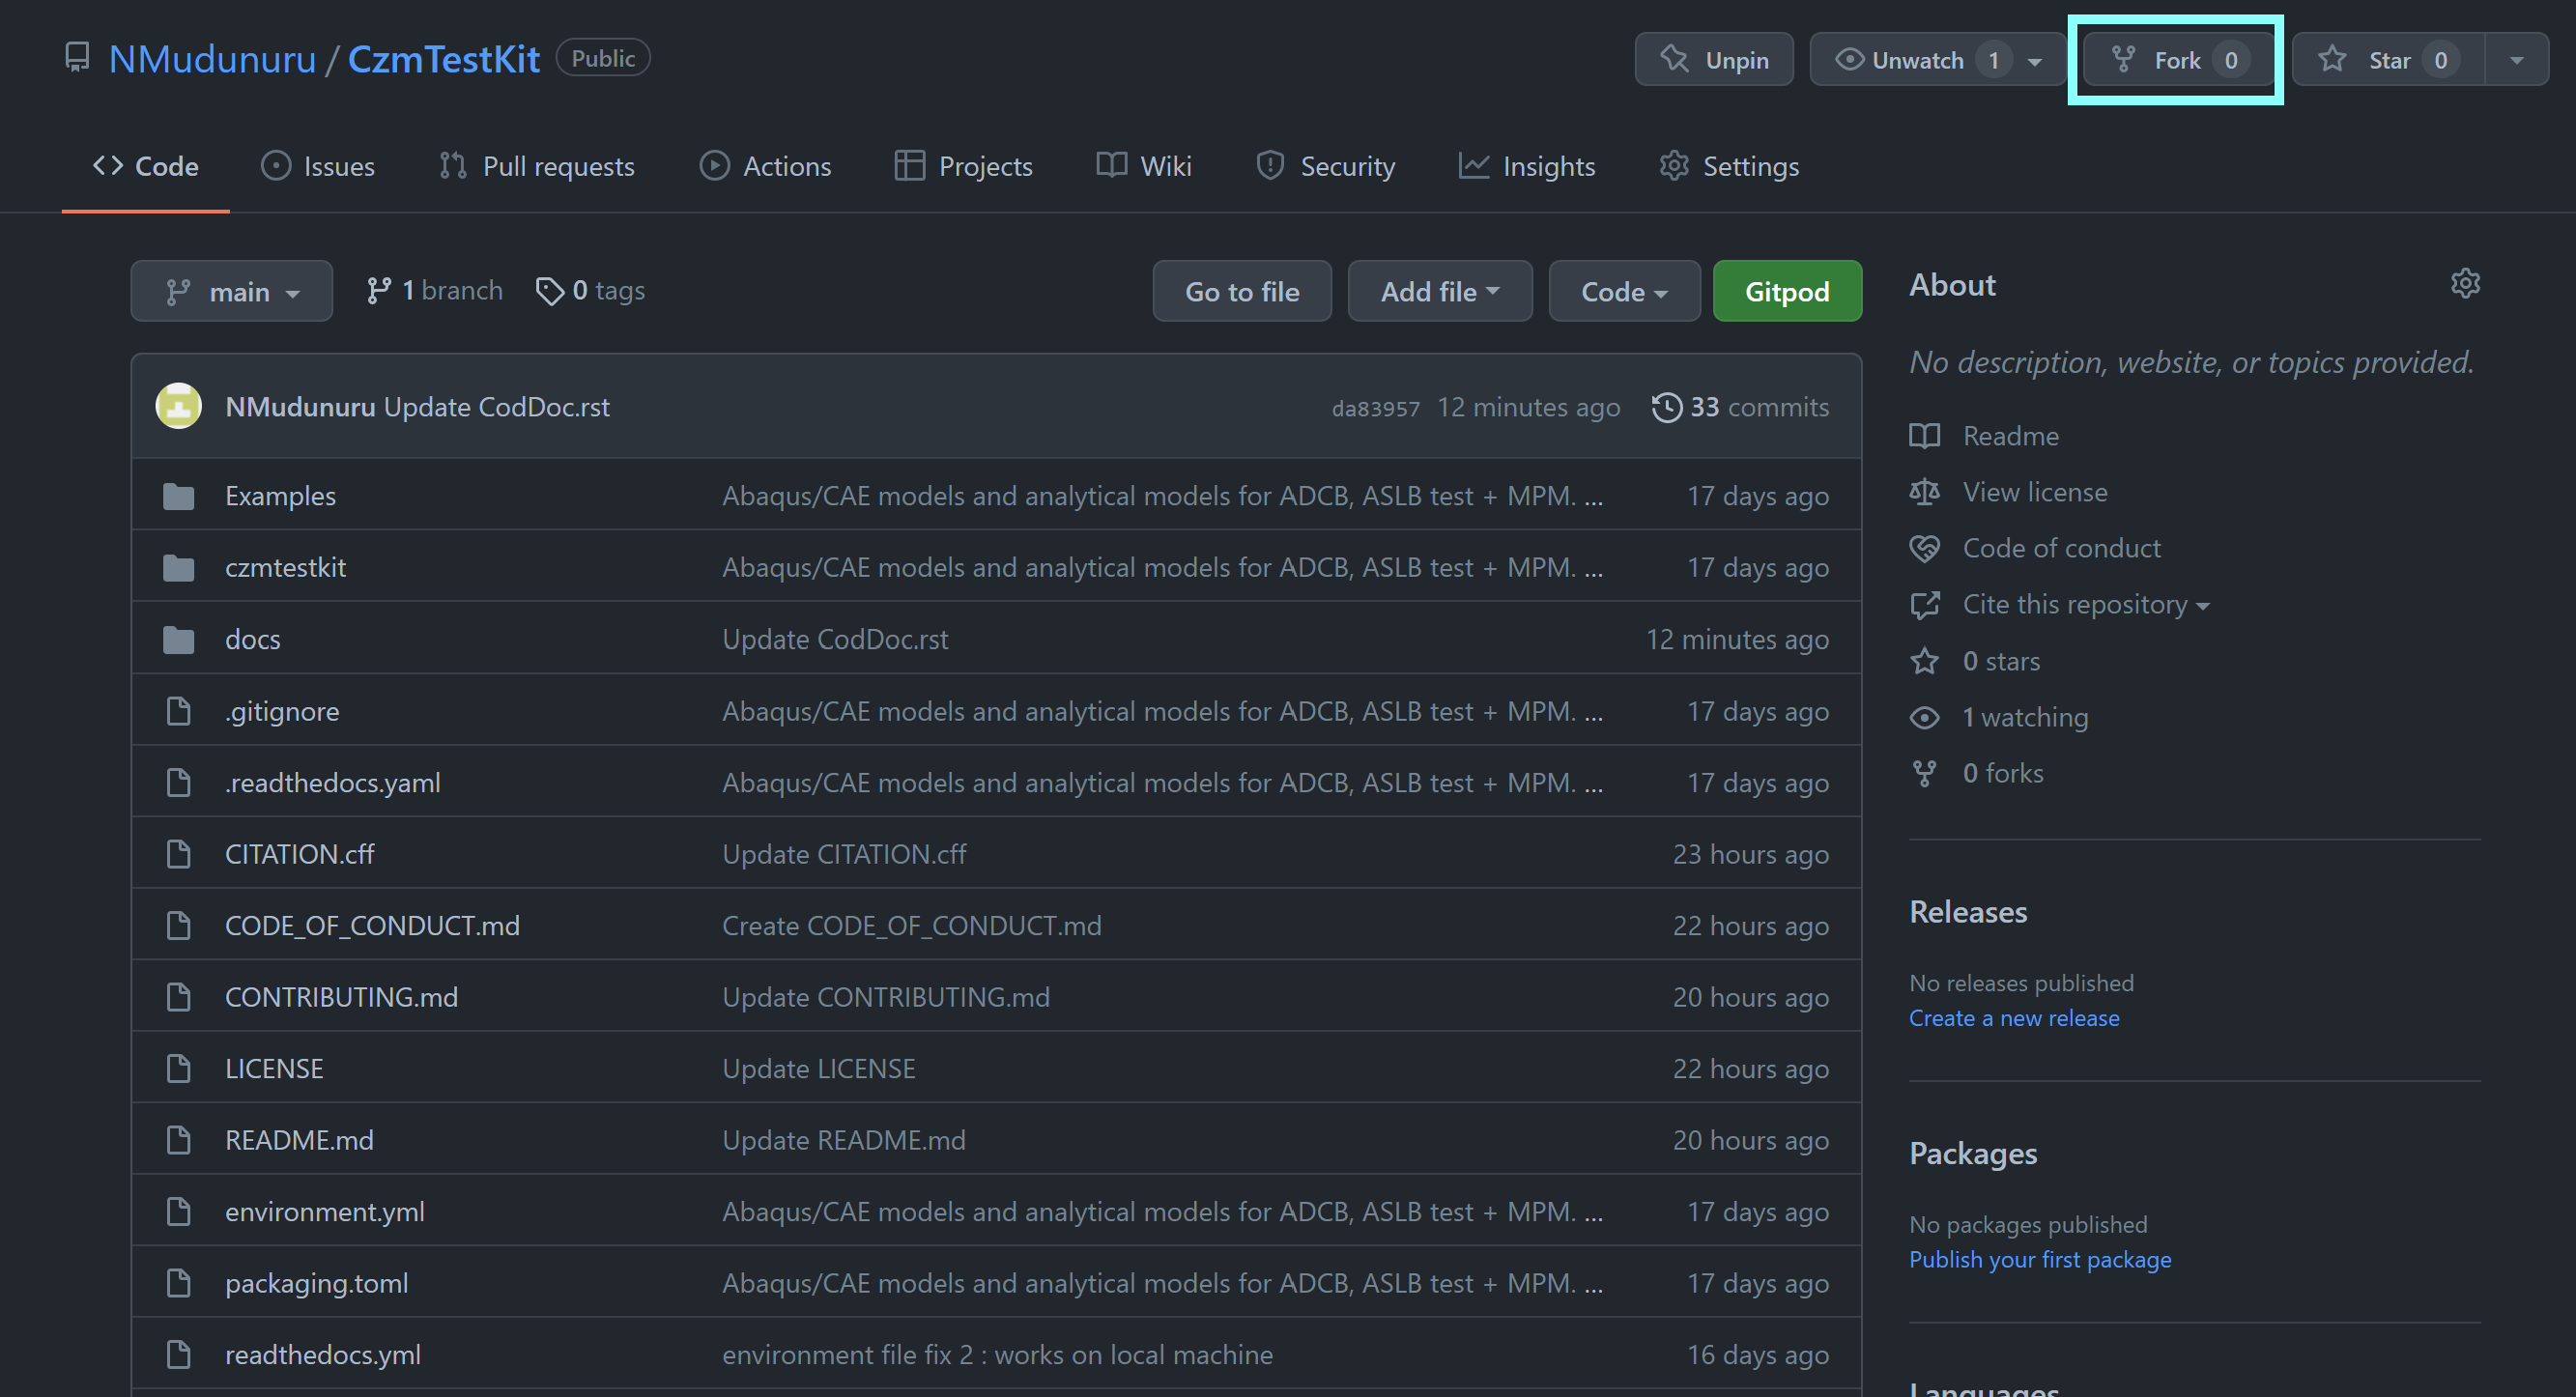
Windows 10
Fork the git repository https://github.com/NMudunuru/CzmTestKit.git of the package. The link to the git repository will take you to the following page. Use the Fork option highlighted below to add a copy of the repository to your git hub account.
Setup the
CzmTestKitrepository on your local machine by cloning your fork repository.$ git clone <url of your fork>
Create conda environment
CzmTestKitwith dependencies required for the package. This can be done using theenvironment.ymlfile in theCzmTestKitdirectory.$ cd <path to the package environment file for example C:\Users\User\Desktop\CzmTestKit> $ conda env create -f environment.yml
Activate the environment.
$ conda activate CzmTestKit
Install the source code of the package. Do not use
$ pip install CzmTestKithere, as this will install the distributed PyPI version of the package. The goal here is to install the package from the local package for testing. Therefore, use the following command from the localCzmTestKitdirectory.$ pip install -e .
Edit the source code and reinstall the package. Repeat steps 4, 5 to reinstall the package. See the source code documentation for guidelines on current code functionality and structure. If needed, contact the primary authors to guide you through the code.
Test the changes and repeat the previous step if further changes are necessary.
When you are ready, update the documentation and push the changes to your remote. Then, send a pull request to the main package repository in https://github.com/NMudunuru/CzmTestKit.git, e.g. following the instructions here. Use the following checklist to ensure that the changes are clear and well documented.
 - [] Update the following meta data in the docstrings of the module source code:
     - [] Date of edit or update.
     - [] Author info and email.
     - [] Module version.
     - [] Inline comments. (Include author and version info for updates)
 - [] Create a tutorial for using the update in the form of an example jupyter notebook in the `Examples` subdirectoty.
 - [] Add the tutorial notebook to the documentation.
 - [] Update the description and the version in the `README.md`, and the `setup.py` file.
 - [] Update documentation version in `docs\source\conf.py`
Add this list to your pull request message and change the
[]s of completed items in the list to[x].
If you feel like you have a valuable contribution to make, but you don’t know how to complete some of the items in this checklist such as writing or running tests or updating the documentation: don’t let this discourage you from making the pull request; we can help you! Just go ahead and submit the pull request, but keep in mind that you might be asked to make additional commits to your pull request.
Steps for testing the documentation
The package documentation is hosted by readthedocs, where the changes merged to main branch of the git repository are automatically reflected in the published documentation.
However, it is necessary to locally test the documentation before pushing to the main. Use the following steps to locally build and test the documentation.
Windows 10
Setup the local repository using instructions from the previous section.
Create conda environment
docswith dependencies required for building the documentation. This can be done using theenvironment.ymlfile in thedocssubdirectory of theCzmTestKitdirectory.$ cd <path to the docs environment file for example C:\Users\User\Desktop\CzmTestKit\docs> $ conda env create -f environment.yml
Activate the environment.
$ conda activate docs
From the
docssubdirectory inCzmTestKit, execute the documenation source.$ cd <path to the docs environment file for example C:\Users\User\Desktop\CzmTestKit\docs> $ make html
Executing the documentation source will result in a
builddirectory in thedocssubdirectory with the html files indocs\build\htmlsubdirectory, wheredocs\build\html\index.htmlwill be the home page for the documentation. If your command line interface does not recongnize themakecommand you can use the following method to generate the documentation build$ sphinx-build source buildRepeat the previous step till the updates in the documentation are satisfactory.